Week 11 [Mon, Mar 27th] - Programming Topics
GUIs
GUI Basics
Writing Graphical User Interfaces (GUIs) is relatively more complicated than writing regular code. Here, we give a very small peek into GUI programming in Python.
There are different frameworks that you can use to write Python graphical user interfaces (GUIs) e.g., Tkinter, KIVY, PyQT, WxPython. The one we'll be using here is Tkinter, which is a way to use the popular Tk GUI framework .
Tkinter comes with the Python installation; you can start writing Tkinter GUIs right away without having to install anything extra.
Here is the code for the simplest GUI:
| → | 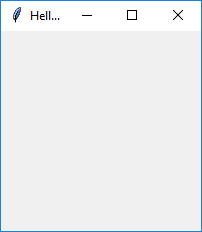 |
A GUI typically contains . The example GUI below not only has some widgets but also has some dynamic behavior i.e., clicking the button increments the displayed number by the amount in the text box.
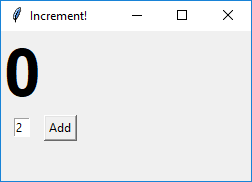 | → | 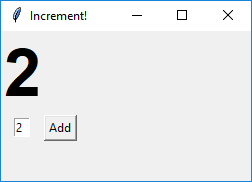 |
Here's the full code for the above example:
from tkinter import *

# create a window
window = Tk()
window.title('Increment!')
window.geometry('250x150')

# create a label
label = Label(window, text='0', font=("Arial Bold", 50))
label.grid(column=0, row=0)

# create a text box
textbox = Entry(window, width=2)
textbox.grid(column=0, row=1)
textbox.insert(0, '2')


# define a function to be called when the button is clicked
def button_clicked():
    label_value = int(label['text'])  # get int value of the label text
    textbox_value = int(textbox.get())  # get int value of the textbox text
    label.configure(text=str(label_value + textbox_value))  # set label text to the sum of above two


# add a button, bind it to the function
button_ok = Button(window, text="Add", command=button_clicked)
button_ok.grid(column=1, row=1)

# start the window
window.mainloop()
Let's go through the code to see how it works.
window.geometry('250x150')Sets the size of the Window.
label = Label(window, text='0', font=("Arial Bold", 50)) label.grid(column=0, row=0)- Creates a Label widget to show the current total. Sets its value to
0. Sets the font toArial Boldand font size to50. - There are different ways to define the of the GUI. In this case we are using a . This statement places the label at
0,0cell of the grid.
- Creates a Label widget to show the current total. Sets its value to
textbox = Entry(window, width=2) textbox.grid(column=0, row=1) textbox.insert(0, '2')- Creates an Entry widget for the user to enter the increment size. Sets its width to
2characters. - Places it at the
0,1cell (i.e., first column, 2nd row). - Sets the initial value of the widget to
2. The value it placed at the0th character position.
- Creates an Entry widget for the user to enter the increment size. Sets its width to
def button_clicked(): label_value = int(label['text']) textbox_value = int(textbox.get()) label.configure(text=str(label_value + textbox_value))- Creates a function to be called when the button is clicked. It will increment the value shown in the label by the amount shown in the entry widget.
- line #20: Reads the
textproperty of the label widget and converts it to anint - line #21: Reads the value of the entry widget and converts it to an
int - line #22: Sums the two values, converts the sum into a
str, and sets it as the value of the label widget.
button_ok = Button(window, text="Add", command=button_clicked) button_ok.grid(column=1, row=1)- Creates a Button widget for the user to click. Sets its display text to
Add. Sets its command to the functionbutton_clickedi.e., when the button is clicked, the specified function will be called. - Places the button in the
1,1cell of the grid.
- Creates a Button widget for the user to click. Sets its display text to
Resources:
- Best Python GUI Framework/Toolkits 2019
- Python Tkinter Course from python-course.eu